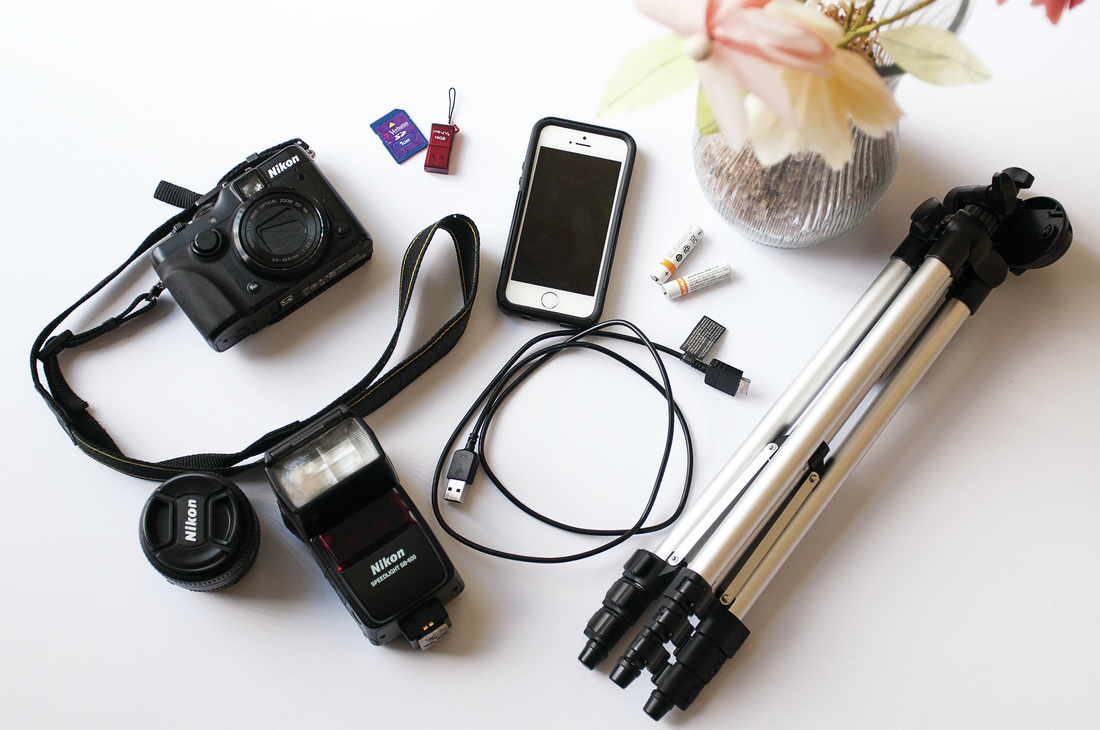
 It is that time of the year... Family vacation time!. As most families start preparing to set their time off and select beautiful locations to go to for a well deserved time to rest and have fun, one of the main items packed in every bag is some sort of photo camera. A yearly vacation is the best time to document your family story because you are all together, you're ready to have fun and you have the time. How beautiful it is to be able to look back at the pictures from your trip and relive all those wonderful moments! Here are a few tips to help you improve those family shots to keep them for years to come. 1. Pack the right camera equipment If you are one of those who write down a list of all the things they need to pack in their bag, then here is one more for you to add: camera equipment. The amount of gear that you decide to take with you depends on the destination and how much weight you are willing to carry! Whether you are a pro or a hobbyist, there is always more than just your DSLR or smartphone to take with you. You might also want to invest in other accessories, such as a tripod and a selfie stick. If you are not taking a laptop to upload pictures from your camera, then it could be a good idea to pack an extra memory card to make sure you do not run out of memory in the middle of your trip. Don't forget cables, batteries (they tend to be pricey at resorts and airports), external flash and additional lenses, if you have them. 2. Prepare for the trip by reviewing your camera manual I know... I know... Who has time to read the manual? I don't mean you need to read it entirely. Just make sure you know about the main settings and the best situations in which each one should be used to get the best out of your equipment. Things like replacing batteries, using the different shutter settings and changing memory cards are also a must know.  Left. Picture taken without using flash. Right. Picture taken with 1 flash unit, off camera. 3. Be aware of the light One of the most important things in photography is light. Being aware of the light situation surrounding you can help you create much better pictures. There is a lot that can be said about lighting in photography. I won't go into all of the details, but it is worth mentioning some of the most typical light situations that may arise when on vacation and how to properly handle them. a) Harsh sunlight. Whenever you are able, try to avoid taking pictures in harsh sunlight. This is not the most flattering type of light as it creates harsh shadows and squinting. Whenever possible, take your pictures in the shade. If you are on the beach with no shade available, use an umbrella or a blanket to diffuse the sunlight. Make sure to keep those out of the frame when snapping the shot. b) Sunset light. In most cases, when shooting with the sunset the subject/s in the picture come out dark and/or blurry. How can that be fixed? By using flash! As your camera focuses on properly exposing the light in the background, you will not have enough light cast over those in the foreground. That is when you need to add some sort of light, either flash or a reflector. Try to find things that will reflect that wonderful sunset light back onto your subjects faces; such as aluminum foil, a mirror, or a white wall. c) Night light. For those pictures in or outside in very low light situation, consider using candles, lanterns, or the video light from your smartphone. Additionally, you need to hold the camera as still as possible. For best results place your camera on a tripod, or flat surface to avoid shaking. In the example picture above, both shots were taken in the same spot and just seconds apart. The one on the left was taken without flash, and the one on the right with flash. You can see what a big difference a light source can make on your pictures. 4. Choose the background carefully When it comes to the background (what's behind the main subject/s in a picture) remember that it is best to keep it simple. Try to avoid photographing your family in front of very busy or distracting backgrounds, remove the clutter when possible and consider re-positioning people as needed. It takes just a few extra minutes to do so but the results are worth the extra effort. 5. Try new things It is very easy to end up with 200 pictures at the end of your trip that look pretty much the same. We all have a preferred angle and feel comfortable having our portrait taken in a certain way. This vacation try something different. Step up to take pictures from above; lie down to take pictures from a lower angle; pay attention to details and special moments; find frames within the frame; and experiment with tilting your camera sideways. Apart from the posed shots, thrive to capture candid moments that tell a story; moments that will trigger that special memory when you see them again. Aim to get at least one great family picture to frame or to use for your Christmas card.  6. Get a lot closer
Although you might feel inclined to snap a wide shot of your family with all the beautiful scenery behind them, take a few steps closer and grab a cozier picture, including just a few details around them. Sometimes, less is more. If you are snapping with your smartphone camera, remember that the zoom is not a real zoom. Even if it shows great on your phone screen, it might be pix-elated or blurry when blown bigger. Experiment with different distances from the subject/s and have fun taking lots and lots of pictures. 7. BE in your pictures There always seems to be a "designated photographer" in each family vacation trip, isn't it? Always holding a camera and ready to snap a shot. Well, even the "designated photographer" needs to be in the picture. Here is when a tripod or a selfie stick come handy. You can also ask a by stander to snap a shot here and there with you in it. 8. Print your photos The very last tip of today is print, print, print your pictures! As soon as you make some time to upload the pictures onto your computer, select the ones you want to print first, plan for sizes and spots on your walls or albums where you want to display them, and send them to the lab to be printed. That is the best way to preserve your memories. Pictures taken with your smartphone can also be printed, within some limitations depending on how they were taken. For more information about printing cellphone pictures, I find this blog to be very helpful: http://iphonephotographyschool.com/print-photos/ Make sure you back up all of your digital files to a safe place! Happy shooting folks!
0 Comments
|
